Cards For Sale

Wednesday, November 30, 2011

Paper Crafters Sampler Blog Hop


Hello Peeps and Welcome to the Paper Crafters Sampler  "Adorned Holiday" mini blog hop.  
The hop features a Creative Take on the three holiday templates available in the December issue of the Sampler; Winter Sleigh, Sled and Limoge Trinket Box.


You’re free to start viewing the hop at my blog, it will go full circle so no worries about missing anything. 
If you arrived here from Lisa's Blog, didn't you love her take on these templates? I LOVE how versatile they are and how we can all start with the same template and get so many great looks.


Here is what I did with them.
 First up is the Sled, gift card holder. If you noticed, in my group shot, I made mine all in the same color scheme. I like how they look all grouped together. :) I used Crumb Cake and Riding Hood Red card stock. I made the poinsettia with the Build a Blossom Punch, using the smallest leaf on the punch. The sentiment comes from the "Four Christmas" stamp set. My picture doesn't show it but the sled sits on a small box perfect for a gift card, cash, keys to an brand new car, or whatever you would like to slip inside. 


Next up is the "Limoge" Trinket Box. I printed the template onto Riding Hood Red card stock. The DSP I used is from the "Letters to Santa" paper pack. I printed an extra template onto some plain white card stock and cut it apart to use for the template for the DSP.  I added old olive grosgrain ribbon, silver brads and made a little top "knob"  with three stacked buttons. I added a "very merry" sentiment from the "Short & Sweet" stamp set.  The box is very sweet and the lid is hinged which is very cool and the size is perfect for a few chocolate kisses.


Lastly is my favorite of the three templates, the "Winter Sleigh". This template comes together so quickly you could make alot of these in no time. I again printed onto Riding Hood Red card stock and onto some white card stock to cut apart for the DSP.
I made some 'holly leaves"  using my oval and slit punches and added three red berries to the top. I add some crystal effects to the berries. I used some riding hood red taffeta ribbon to make the bow. The sentiment on here also comes from the Stampin Up set "Four the Holidays" I made some tiny present boxes to go inside the sleigh.


Well, that is all from me so let's continue this hop over on Heidi's Blog, I know she has more fabulous ideas with these templates to share.


Thanks for coming by and remember these templates are available in The Paper Crafters Adorned Holiday Edition.


Vicki

CCMC......Very Merry MOJO Ornament Card


Happy Hump Day Peeps! Can you believe it is the last day of November already?  The year has just flown by!
Today I am sharing a card I made using two different challenges, the color challenge on Create with Connie  and Mary and this weeks Mojo Monday sketch challenge.
I again am using one of my fave sets, Stampin' Up "Greeting Card Kids". You all know how I love this little vintage looking girl pulling her sled. It doesn't matter what colors i use with her, she just sings!!

I choose to make the round card from the sketch and made it into an ornament card. I cut a scallop circle by folding my night of navy card stock in half and using the largest scallop circle nestie, leaving the fold just below the cut line on the die. I then cut a circle with river rock card stock and embossed with the square lattice EF. I used some Well Worn DSP at the bottom.


I used some lucky limeade ribbon across the bottom and down the side. I made a bow and added a antique brad to the center. The main image is added to the card with some dimesionals.  The sentiment is from the Stampin Up "Short & Sweet" stamp set and I stamped onto white card stock used my word window punch to punch it out. I matted it with a night of navy piece punched with the modern label punch. I added some basic pearls to the ends.
I made the card into a ornament by adding the top piece, made with the round tab punch with lucky limeade card stock and folded in half. I embossed this piece with the square lattice EF too. I added some white bakers twine for it to hang by.


Well, that is all from me today, thanks so much for stopping by and
HAPPY STAMPING!!!

Vicki

Tuesday, November 29, 2011

SC360.....Peace, Love, Joy


Happy Tuesday peeps!!

Today I am sharing a card I made using the a sketch on Splitcoaststampers. I loved this sketch when I saw it last week but because I had alot going on I didn't get to play along, but after seeing this card and this one and also this one I had to make a version! I love the little bird punch made into a cardinal.
I did change it up a bit to make it my own, I used some retired DSP and the sentiment is also from a retired set.

The base of my card is real red card stock and I followed that up with some whiser white and then the DSP. I then ran this layer through the bog shot with the Snow Burst EF. It doesn't really show to much in the picture but it is a cool effect and the paper looks kinda candy cane like when embossed.


You can see some of the embossing in the close up picture. I first stamped the sentiment with black onto white and punched it out. The mat is from the Perfect Pennants Die. I then punched out my bird and wing with real red and added it to the sentiment piece with a dimesional,   I then punched a bunch of leaves with the bird punch using old olive and always artichoke card stock. I started layering the leaves all around the bird to form the "nest" I used the owl punch to make the tiny red berries.
 I then cut a white scallop strip with the Tasteful Trim Die and added it down the side under the sentiment piece. I added a bit of 1/8" taffeta ribbon and a bow.


  Three basic rhinestones finished it up. Well, that is all from me today. Thanks so much for stopping by!

HAPPY STAMPING
Vicki

Monday, November 28, 2011

Paper Players Sketch Challenge


Happy Monday Peeps! Hope you all had a great weekend!

Today I am sharing a card I made using the sketch challenge this week on the The Paper Players Blog.

I started my card out with a base of Crumb Cake card stock. I followed that up with some riding hood red card stock and the DSP I used is from the Stampin Up "Letters to Santa" paper pack.
The strip across the bottom is some crumb cake that I embossed with the square lattice EF and is matted with some early espresso card stock that has be punched along the bottom with the lace edge punch.
The angled piece is some more of the Letters to Santa DSP and is also matted with the early espresso card stock.
The main image is from the Stampin Up "Beautiful Season" stamp set. I stamped onto white card stock with black stazon and colored with my aqua painter and ink pads. I shaded and splattered the  image using crumb cake and early espresso ink. I cut the ovals and scallop ovals with my nesties.


I wanted to use some ribbon across the bottom and was going to use some crumb cake seam binding ribbon but when I got my spool out, it had almost none left. So I started looking around for some other to use and came across all the wide striped ribbon I have and almost never use. I like the wide striped ribbon and LOVE it when I see it on other peoples cards but I have a hard time using it. I have a bunch, full rolls that have never been used, I bought spools of every color that was on the clearance rack a few months back. So I talked my self into taking the leap and using some, what do you think, to much stripes going on? I may change it up and try some satin ribbon, I do love the satin ribbon so much.
The sentiment on here is from the Teeny Tiny Wishes stamp set and I added some silver pearls in the corners to finish it off!

Thanks so much for stopping by and HAPPY STAMPING!!!

Vicki

Sunday, November 27, 2011

SSSC145......Merry Christmas Snowman


Good Morning Peeps!!!
It is Sunday which means it's time for another Sweet Sunday Sketch Challenge.

Here is the SWEET sketch Karen has for us this week:


I had made a card for a friend earlier this week with these papers and they were still out on my desk so how about a non traditional colored Christmas card?
I do love the colors in this paper pack the Stampin Up Cheerful Treat DSP.
I started the card with a base of Concord Crush card stock and then the next layer is some retired (but I still LOVE and have hoarded a bunch) pale plum card stock. I embossed this with the Snow Burst EF. The bottom part of the card is some of the above mentioned DSP. I used some concord crush ribbon for the strips in the sketch.


The snowman is from the Snow Much Fun stamp set. I stamped with black stazon onto the white card stock and colored with my aqua painter and ink pads. I used Lucky Limeade and Concord Crush ink and a bit of crumb cake and pumpkin pie. I added the "snow" using the silver glimmer paper from Stampin UP. The snowflakes are die cut with the Northern Frost die strip and I added some basic pearls to the centers. The sentiment is from the "Teeny Tiny Wishes" stamp set. I added a bit more sparkle on the snowman and is snow ball (he he) with some dazzling details.

I hope you can find some time to play along with us this week, I would love to see what you come up with, create a card or scrapbook page with this sketch and then go to Karen's blog and link up your project for all of us to see.

OK, let's see what the rest of the Sweet Sunday Sketch Team has in store for us this week:


Well, thank you for stopping by today and HAPPY STAMPING!!!

Vicki

Saturday, November 26, 2011

OCC....O Christmas Tree Challenge


Happy Saturday Peeps!!! 
It is time for another Our Creative Corner Challenge. 

This week our hostess is the fabulous Wendy Jansen and she has a fun challenge for us. 
This is her challenge:

This is the weekend I like to put up my Christmas tree and decorations.  
The challenge is to make a project with a Christmas tree (or pine tree if you would rather) on it.

So how about a Christmas Tree Ornament to decorate your Christmas Tree?


Most of you know that I developed a slight obsession for this paper ( still have a ton of it in my stash) that I found locally last year, so it was bound to make an appearance again this year. I cut out a bunch of these trees using a die, some chipboard and "the paper". 
I "decorated" my trees using some dazzling diamonds, and some pretty cherry cobbler seam binding ribbon and some rusty jingle bells and beads. They are really easy to make and they satisfy my "prim" lovin' heart!


I have made alot of these, once I start I can't seem to stop, but they will make nice little tree ornaments, gift tags and basket tie ons. 

Be sure to check the Our Creative Corner Blog to see what the rest of the design team came up with for this fun  challenge.
I hope you can find some time to play along and if you do, don't forget to link it up over on the Our Creative Corner Blog so we can all see it!

Thanks for stopping by today and HAPPY STAMPING!!!!

Vicki

Friday, November 25, 2011

Color Challenge Pocket Card


Good Friday Morning peeps!!!

Today I am sharing a pocket card I made using the color challenge this week on Splitcoaststampers. The colors to use are Blushing Bride, Pear Pizzazz and Marina Mist with a neutral of white or vanilla. The dessert option was to make it a Christmas card. Check!

I decided I wanted to make a pocket card I had seen a darling one made by Beate and used it as my inspiration for this. I changed it up to use the stamps and papers I have and too match the color challenge.

I started with a base of Marina Mist 4-1/4 inches x 11 inches, scoring at 1-1/2 and 5-1/2 inches. I rounded all four corners with my corner rounder punch. Then folded it up and used some sticky tape along the sides.
The insert is 5 x 3-1/4 inches.


Now just decorate like you like. I used the Stampin Up Greeting Card Kids stamp set and the doily in the corner is cut from the  Flirtatious DSP. I added some buttons and pretty ribbon. The DSP on the front and the insert is from the Stampin Up Letters to Santa paper pack, The sentiment comes from the Stampin Up Bells & Boughs Stamp set.


I colored the image with my aqua painter and ink pads. The image is stamped with black stazon onto white card stock. I added a few small basic pearls that I colored with a marker and added them to the tree.

Well, that is all from me, thanks for stopping by and HAPPY STAMPING!!!!

Vicki

Tuesday, November 22, 2011

Paper Players Color Challenge


This week the The Paper Players have a fun color challenge and I wanted to play along.
The colors to use are Night of Navy, Silver and White.

I used the Stampin Up Christmas Lodge stamp set and stamped the lodge with night of navy ink onto whisper white card stock and cut out with my nestie dies.
I used Night of Navy for my base and then added some White that I embossed with the Snow Burst EF and then used some Silver Glimmer paper on the bottom. 


I added some silver and navy scallops across the bottom and some pretty night of navy satin ribbon. 
I cut out a couple of snow flakes from the Northern Flurries die and added them to the main image piece. The little sentiment is from the Tiny Tags set and is added to the bow with some silver cord.

Very easy and oh so sparkly!! Gotta Love that!

Thanks for stopping by today and HAPPY STAMPING!!

Vicki

Sunday, November 20, 2011

SSSC144.....Vintage Tree


Good Morning Peeps!!!
It is Sunday which means it's time for another Sweet Sunday Sketch Challenge.

Here is the SWEET sketch Karen has for us this week:

I was inspired by a card I saw by  Ann Schach. She had used the big tree from the Stampin Up Christmas Lodge stamp set and added some pearls that she colored with a permanent marker. I loved the look so I decided to do the same with this sketch.
I had to make my card a bit large to accommodate  the large tree. The card is 5 x 5-1/2 inches, I used my coluzzle to cut the oval and then I just roughed up the edges with my distressing tool. The image is stamped with always artichoke ink onto the very vanilla oval. I added a bit of distressing by using a couple of the stamps from the French Foliage stamp set. I stamped with crumb cake ink and off stamped onto scrap paper before stamping on the main piece. I sponged the edges with crumb cake and a bit of early espresso ink.


The base of the card is crumb cake and I followed that with some cherry cobbler and the DSP is from the Frostwood Lodge paper pack. I sponged the edges of all layers with Early Espresso ink. The sentiment is from the same set and is stamped and sponged and distressed a bit with Early Espresso ink. I added some Crumb Cake seam binding ribbon and some basic pearls in the corners. I decided after having this mostly done to add the doily lace trim around the edges of the main image. I sponged this with Early Espresso ink too and then cut and pieced it around the oval.

I hope you can find some time to play along with us this week, I would love to see what you come up with, create a card or scrapbook page with this sketch and then go to Karen's blog and link up your project for all of us to see.

OK, let's see what the rest of the Sweet Sunday Sketch Team has in store for us this week:


Well, thank you for stopping by today and HAPPY STAMPING!!!

Vicki

Saturday, November 19, 2011

OCC.....Inspiration Photo


Happy Saturday Peeps!!! 
It is time for another Our Creative Corner Challenge. 

This week our hostess is the fabulous Holly Kean and she has  photo inspiration challenge for us:


This beautifully unique Thanksgiving table is far and away more fancy than ours will likely be for Thanksgiving but isn't it just gorgeous? Find some inspiration in it and create a Thanksgiving, Holiday or New Year's card or other paper project based on that inspiration. Make sure you include in your posting where your inspiration came from and how you incorporated it into your project.

I hope you all will forgive me one more punched pumpkin. I really struggled as which way to go with this inspiration, I originally thought I would make my pumpkin vase of flowers with some gold card stock, I punched and embossed some of the SU Brushed Gold card stock but when I was putting the card together the gold just looked so dull with the card I had to change it up and make a pumpkin pie one instead. I used the bird punch for all my leaves and added some small pumpkin pie flowers.

I used the sketch challenge over at Create with Connie and Mary for my card layout. The base is Early Espresso card stock and then I followed that up with some very vanilla and then another layer of Early Espresso that I embossed with the square lattice EF.
The DSP I used is from the Spice Cake paper pack. I cut three sizes and matted with some very vanilla card stock.


I added some crochet ribbon across the middle and tied a pretty bow. I then added alot of gold pearls for accents. I took inspiration from the photo in the colors, I like the blue in the photo but used a different shade and then the centerpiece in the photo is a pumpkin filled with pretty flowers, and lots of gold accents.


Be sure to check the Our Creative Corner Blog to see what the rest of the design team came up with for this fun  challenge.
I hope you can find some time to play along and if you do, don't forget to link it up over on the Our Creative Corner Blog so we can all see it!

Thanks for stopping by today and HAPPY STAMPING!!!!

Vicki

Friday, November 18, 2011

Making MittenTags


Happy Friday Peeps!!
As you guys know I have been making alot of gift tags lately, these mittens are a couple of my faves, there will definitely be more of these.

I love mittens, I almost always have a pair or two I use in the winter, not real practical I guess but I think they are tooo cute!! I have regular gloves too but mittens are my fave. I drew a template for these, super easy as and simple. I then cut a few out of real red card stock and embossed them with the square lattice EF, kinda makes them look knitted.  I then cut the cuff of the mitten with some white card stock and embossed that part with the Snow Burst EF.


Then comes the fun stuff, the decorating. I used some satin ribbon, and buttons. I made some holly leaves using the wide oval punch and the slit punch. I added some rusty jingle bells, twine and a little sentiment tag.


I used some seam binding ribbon on the one with the holly leaves. These could be easily made into gift card holders too by just adding another mitten on the back. You can dress these up as much or as little as you like, I have alot of fun little embellishments in my stash that would be cute, I am sure most of you do too. Some snowflakes would be cute too.


So get busy and make yourself a bunch, they would be really cute as ornaments and on a gift basket too.

Well, that is all from me today, I will be back in the morning with this week's OCC challenge post.
Thanks for stopping by and HAPPY STAMPING!!!

Thursday, November 17, 2011

SC359....Merry


Happy Thursday Peeps!!

Today I am sharing a card I made using the sketch challenge on  Splitcoaststampers.

When I saw the sketch I knew I wanted to use some snowflakes down the side for the square elements on the sketch, no surprise there alot of people used snowflakes if you take a look in the sketch gallery you will see that. I also reached for my new favorite stamp set, Stampin Up's "A Beautiful Season". I love the main image in this set, the holly leaves and little chickadee. They are so easy to watercolor and make a really beautiful Christmas or Winter type card. 


I used basic gray card stock for the base of the card and then followed that with some basic black and then another piece of basic gray that I embossed with the square lattice EF. I embossed a piece of real red card stock with the Snow Burst EF and added it. The snow flakes are cut from the Northern Frost Die strip. the main image is matted with real red and basic black. I added some silver pearls to the snow flake centers and to the corners of the card. I first thought I would stamp my sentiment onto the min image piece but I smeared it a bit when I stamped so I just went with a little flag.

Well, that is all from me today, thanks so much for stopping by and 
HAPPY STAMPING!!!

Vicki

Wednesday, November 16, 2011

CC349.....Birthday Wishes


Happy Hump Day Peeps!!

Today I am sharing a card I made using the color challenge this week on Splitcoaststampers.
Loved this color combo, Baja Breeze, Calypso Coral and Lucky Limeade with a neutral of your choice and the dessert option was to have a decorative edge.

I immediately thought of flowers, these colors are perfect for that. I pulled out a set I LOVE, the Stampin Up "Array of Sunshine" This is a hostess set. I stamped a bunch of the flower onto whisper white card stock using calypso coral ink. I stamped the flower twice with out re-inking to get the two shades of coral. I stamped the leaves with lucky limeade and then I cut them all out an layered up the flowers. I mounted them onto a piece of whisper white card stock that I embossed with the dot folder. I matted the white with a piece of calypso coral card stock. I tucked in a bunch of the cut out leaves around the flowers.


The base of the card is baja breeze and then a layer of white and more baja breeze. I sponged the edges of the baja card stock with baja ink. I punched a strip of lucky limeade with the lace edge punch and ran that across the bottom part of the card. I added the flower piece to the card with some dimensionals.
I added some pearls to the center of the flowers and the "pearl flourishes" are non SU. The sentiment is from the "Something to Celebrate" stamp set, I believe this set is retired.
Well, that is all from me thanks for stopping by and
HAPPY STAMPING!!!

Vicki

Monday, November 14, 2011

Tags, Tags and More Tags


Happy Monday Peeps!
I spent most of my day on Saturday stamping! I had an etsy order for a center step card and for 3 sets of my Christmas Lodge tags that I showed you last week and I got carried away making gift tags, they are fun and fast! I was watching the Hallmark Channel Countdown to Christmas Movie Marathon and the day just slipped away!
I did get alot of tags made. this first set are made using the Stampin Up "Bells and Boughs stamp set.
I stamped the bell image several times onto some rustic cream card stock and colored with my aqua painter and ink pads. I then used my nesties to cut out the circle and the scallop circle. I punched a hole with my crop a dial and added some bakers twine.


Here is another set, this one uses the "Welcome Christmas" stamp set and the sentiment is from the "Christmas Lodge" stamp set.

 Another set made with the Stampin Up
"Winter Post"  stamp set.

This set uses a Santa stamp I have but it is not a SU stamp, but I think he is adorable.

This is just a few of the ones I made, more to come later. I also made a couple of Christmas pocket Cards, I haven't quite finished those up, but will show you when they are done.
Thanks so much for stopping by and
 HAPPY STAMPING!!

Vicki 

Sunday, November 13, 2011

SSSC143.....Merry Christmas Ornaments


Good Morning Peeps!!!
It is Sunday which means it's time for another Sweet Sunday Sketch Challenge.

Here is the SWEET sketch Karen has for us this week:


I started my card out with a base or riding hood red card stock. I then followed that up with some chocolate chip card stock and the DSP on here is from the "Letters to Santa" paper pack.
The ornaments are from the Stampin Up "Tags til Christmas" stamp set and are stamped with riding hood red ink onto some whisper white scraps and I used the ornament punch to punch them out. I embossed a piece of chocolate chip card stock with the Snow Burst EF. I then sponged it with some white craft ink to make it pop. I added the ornaments to this piece with some dimesionals. I used some jute twine for the "hangers" a bow on each ornament.


I used some vanilla seam binding ribbon up the middle of the card and made a bow.
The sentiment is from the "Contempo Christmas stamp set and I stamped with riding hood red ink onto some whisper white card stock. I added a few basic rhinestones on the ornaments and on the corners of the card.


I hope you can find some time to play along with us this week, I would love to see what you come up with, create a card or scrapbook page with this sketch and then go to Karen's blog and link up your project for all of us to see.

OK, let's see what the rest of the Sweet Sunday Sketch Team has in store for us this week:


Well, thank you for stopping by today and HAPPY STAMPING!!!

Vicki

Saturday, November 12, 2011

OCC...Pumpkin Challenge


Happy Saturday Peeps, 
It is time for another Our Creative Corner Challenge. 
This week our hostess is the fabulous
 Wendy Jansen one of my stamping idols, and she has a great challenge for us:
CHALLENGE:  Who doesn't look forward to pumpkin pie at Thanksgiving?!  Well Thanksgiving is soon approaching and with the anticipation of pumpkin pie, the challenge this week is to create a project using pumpkins or the color pumpkin pie as the focal point or main color of your project

I certainly had a completely different idea in mind when I sit down to make this card, I had been thinking about it for a few days and was determined NOT to make a pumpkin out of punches, even tho that was my first thought when I saw the challenge. I have made a few cards with this pumpkin on it and didn't want to make you all sick of seeing it. But something just took over when I started and another pumpkin emerged. This card is a close relative to one I made last week but it is alright sometimes these things just happen. :)
The base of the card is Early Espresso card stock and then I followed that with very vanilla and then some DSP from the Spice Cake paper pack.
I cut a top note with old olive card stock and then embossed it with square lattice EF. I only used half of the top note. and then layered some early espresso ribbon across the top of the top note.

The pumpkin is made up of three wide oval punches with pumpkin pie card stock. I embossed the ovals with the Elegant Lines EF. I added a twine bow with a button and a leaf pin. A stem and a few swirls are made with old olive card stock. The sentiment on here is from the Grateful Greetings stamp set and is stamped with early espresso ink  and then cut apart. I added three gold pearls in the top corner.

Be sure to check the Our Creative Corner Blog to see what the rest of the design team came up with for this fun  challenge.
I hope you can find some time to play along and if you do, don't forget to link it up over on the Our Creative Corner Blog so we can all see it!

Thanks for stopping by today and HAPPY STAMPING!!!!

Vicki

Friday, November 11, 2011

More Christmas Tags


Happy Friday Peeps
I have another set of Vintage-Style Christmas tags to share with you.

These are made the same way as the last ones I shared using the top note die and Crumb Cake card stock.
I used the Stampin Up Greeting Card Kids and Serene Snowflakes stamp set. The sentiment is from the Bells & Boughs stamp set.

You all know I love this little girl from the Greeting Card Kids set. I stamped her with black stazon and colored with my aqua painter and ink pads, using Bravo Burgundy and Early Espresso Ink pads.


I stamped the snowflakes and the sentiment with Bravo Burgundy ink. I sponged the edges with early espresso ink. I used some of the pretty Cherry Cobbler quilted ribbon. 

 Well, that is all from me, thanks so much for stopping by and 
HAPPY STAMPING!!!

Vicki

Wednesday, November 9, 2011

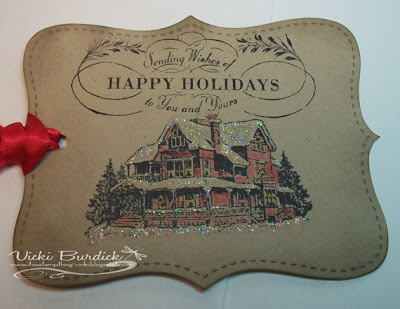
Christmas Lodge Tags


Happy Hump Day Peeps!

I have been making alot of Christmas tags in the past week or so and today I am sharing a set with you.
This is one of my favorites of the groups I made.
This one I used the Stampin Up Christmas Lodge stamp set. Love that lodge!
I used crumb cake card stock and the top note die. 


I stamped the lodge and the sentiment with black stazon onto the top note die cut.
I lightly colored the lodge in with some riding hood red ink and my aqua painter. I added alot of dazzling details to the roofs and ground where the snow is.

I sponged the edges with Early Espresso ink and added some red satin ribbon to the ends.
They look vintage and old-timey I think. :)
I have made some other tags I will be sharing with you in the future here.
These would be great added to your Christmas packages or goodie baskets, the back is blank so you could add a personal message if you wanted.
Be sure and check out my etsy shop if you would like to get yourself a set of these or you can shoot me an email if you like. Thanks for stopping by and 
HAPPY STAMPING!!!

Vicki